
How to Completely Uninstall OpenClaw on MacOS (Don't Leave Anything Behind)
Think clicking 'Uninstall' is enough? OpenClaw actually leaves traces in three places on MacOS: the workspace directory, npm global commands, and the .zshrc environment variable config. Any leftover residue can cause terminal errors or issues installing new tools. This guide covers the complete cleanup steps with screenshots, done in 5 minutes, leaving no traces behind.
After uninstalling OpenClaw, many people still see a bunch of errors when reopening their terminal, or encounter mysterious environment variable conflicts when installing new tools. The reason is simple: you only deleted the ‘surface’—there are still three places hiding residual files.
This guide covers the complete cleanup process with screenshot explanations, done in 5 minutes, with no traces left behind.
Before Uninstalling
⚠️ Before you start: Back up your work files first
Go to the OpenClaw workspace (default location on MacOS: ~/.openclaw/workspace) and back up the files inside: this directory may contain your configured config files, skill files, project files, and more.
The uninstall process will automatically delete this directory. So before you start, copy any files you want to keep to another location.
Start Uninstalling
Open your terminal and enter the following command:
openclaw uninstallAfter executing, the program will ask which components you want to delete. I recommend checking all of them (press Space to select)—this way you’ll get the most thorough cleanup.
After making your selections, press Enter. It will ask again to confirm deletion. Choose Yes to confirm.
The uninstaller will then execute, and you’ll see something like this:
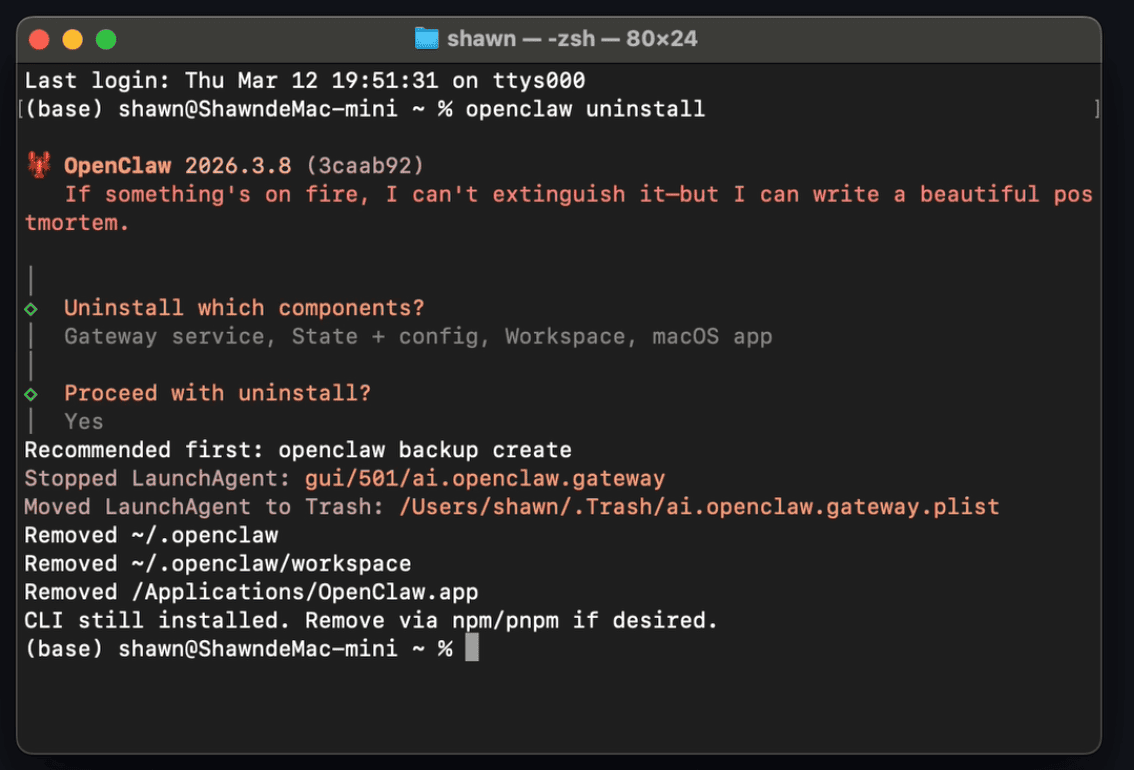
Pay attention to the message here—it will tell you that the OpenClaw command in the CLI has not been deleted yet. This is the first easy-to-miss spot that needs separate handling.
Delete OpenClaw from CLI Using NPM
Why does this need to be deleted separately? Because OpenClaw’s command-line tool is installed globally via npm—it’s not part of the application itself, so the official uninstaller won’t handle this part for you.
Enter the following in the command line:
npm uninstall openclaw -gThis will delete the openclaw command from the CLI. After execution, you should see something like this:
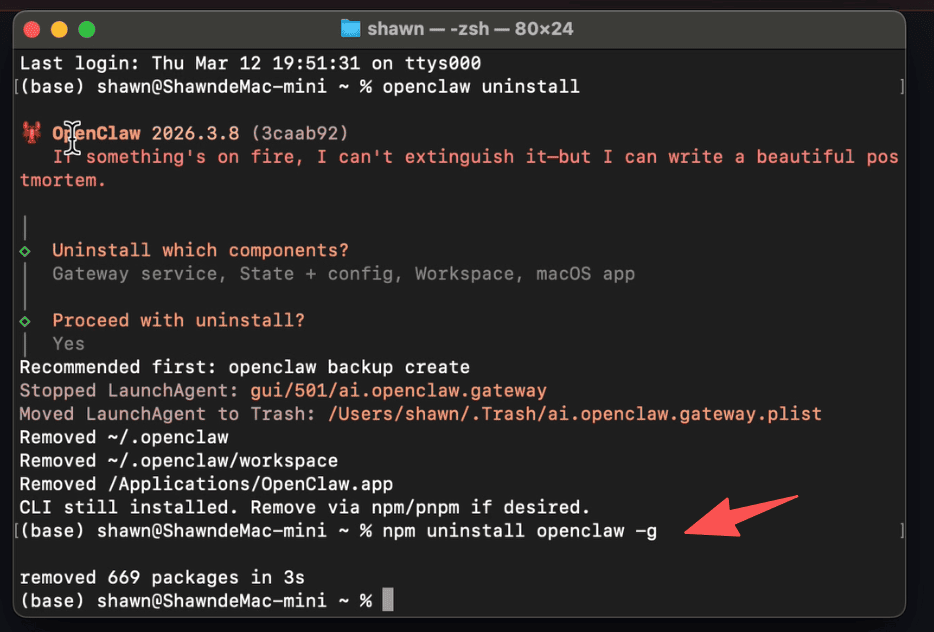
After this step, the openclaw command disappears from your system. But we’re not done yet—
Clean Up OpenClaw Environment Variables in .zshrc
This is the most easily overlooked step, and the one most likely to cause problems later.
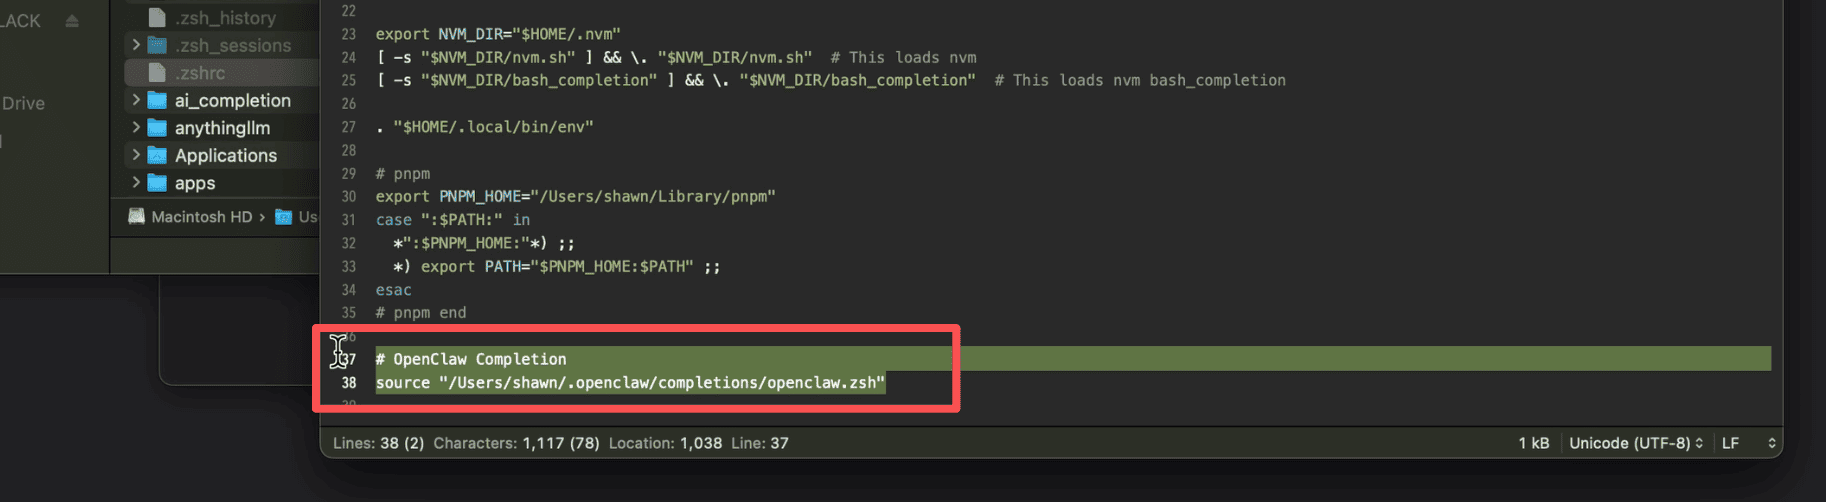
When OpenClaw is installed, it automatically writes a configuration to the end of the ~/.zshrc file to load the command completion script. Even after completing the previous two steps, this code remains there, trying to load a non-existent file every time you open the terminal, causing errors.
On MacOS, find the .zshrc file in your user directory (~/.zshrc). This is a hidden file, so you need to show hidden files—for example, press (shift + command + .) in your user directory. You can also open it with a text editor (or use nano ~/.zshrc in the command line).
Find this code block and delete it entirely:
# OpenClaw Completion
source "/Users/{your_username}/.openclaw/completions/openclaw.zsh"
Find this code block and delete it entirely:
Save the file after deleting. If you’re using nano, press Control + X, then press Y to confirm saving.
Close your terminal (command line tool).
When you open your terminal (command line tool) again, OpenClaw will be completely removed from your system—so long, lobster.
Done
To summarize, uninstalling OpenClaw requires cleaning up three places—none can be skipped:
- Run
openclaw uninstallto delete the application and workspace - Run
npm uninstall openclaw -gto delete the global CLI command - Edit
~/.zshrcto delete the auto-completion configuration code
The whole process takes less than 5 minutes. Follow these steps in order, and you’ll be completely free of this lobster 🦞, leaving no residue behind.
Verify Complete Uninstallation
After completing the three steps above, you can use the following command to confirm that OpenClaw has been completely removed from the system:
which openclawIf there’s no output, it means the uninstall is complete. If a path is still returned, check the npm global directory for any remaining traces:
npm list -g --depth=0Just confirm that openclaw is not in the output list.
If this article helped you, feel free to bookmark and share it with friends who are also using OpenClaw.