Installing ESP-IDF v6.0.2 on macOS (From a `brew install` Error to VSCode Finally Seeing Your Setup)
ESP-IDF installs cleanly from the command line, but the VSCode extension stubbornly insists 'setup not found'? This is a literal walkthrough of my own debugging session: installing `eim` via Homebrew, pulling ESP-IDF v6.0.2 with EIM, scrubbing Windows leftovers out of the project, and finally digging out the real reason the extension can't see your setup—a config key written to the wrong scope. Every command and error below comes from an actual run, so when you hit the same wall you can paste them straight into search.
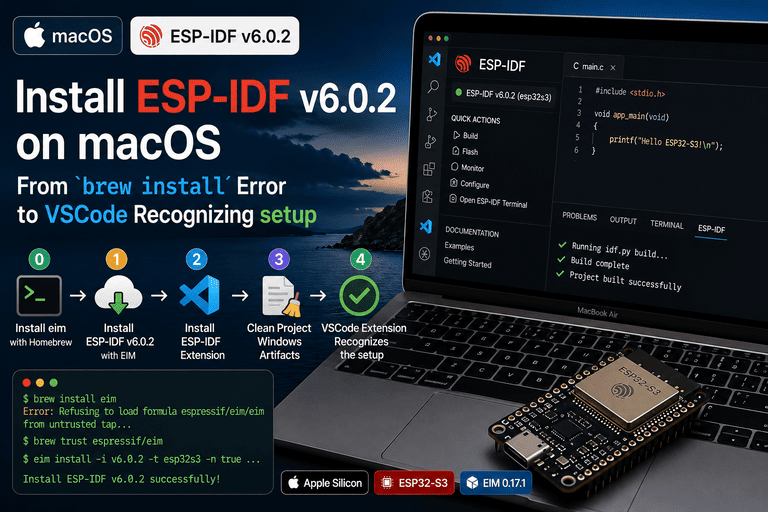
Installing ESP-IDF v6.0.2 on macOS (From a brew install Error to VSCode Finally Seeing Your Setup)
I’d manually installed ESP-IDF twice before and gotten stuck somewhere both times, so this round I redid the whole process from scratch and dug out the root cause of every error along the way. Only after finishing did I realize the pitfalls aren’t really about “installing ESP-IDF” itself—they’re scattered across five unrelated places: installing the eim tool via Homebrew, EIM’s network access, picking the right VSCode extension, cleaning Windows leftovers out of the project, and the way the VSCode extension reads its config. The command-line install went through cleanly, but the VSCode extension kept insisting “setup not found”—and that was the part that cost me the most time to debug. It’s also the focus of this article.
This is a literal record of the pitfalls I hit. All commands and error messages come from actual runs, so if you run into the same error you can copy them straight into search, or hand this article plus your own error to an AI and let it trace the issue following the same approach.
Before you start, double-check your versions. Between ESP-IDF v5.x and v6.0.2, the install method switched from the traditional
install.shto EIM; between VSCode extension 1.x and 2.x, the setup-detection logic was completely rewritten. Different versions—especially for step 4 about extension config—likely mean this guide doesn’t apply at all.
Environment Versions
| Item | Version |
|---|---|
| System | macOS, Apple Silicon (M-series chip) |
| ESP-IDF | v6.0.2 |
| Installer | EIM 0.17.1 |
| VSCode Extension | espressif.esp-idf-extension 2.1.0 |
| Target chip | ESP32-S3 |
The paths in this article use my local username shawn. When you copy commands, swap in your own username (run whoami in the terminal to see it). I’m also running Clash as a local proxy on 127.0.0.1:7890—if you don’t need a proxy, just drop the PROXY env vars and the --mirror flags from the commands; the main flow doesn’t depend on them.
The Overall Path
Five steps, getting subtler as you go:
| Step | What you do | Common snag |
|---|---|---|
| 0 | Install the eim tool itself via Homebrew |
One trust prompt that’s easy to mistake for an error |
| 1 | Use eim to install ESP-IDF v6.0.2 |
Two traps: network and version number |
| 2 | Install the ESP-IDF extension in VSCode | Many same-named plugins—easy to install the wrong one |
| 3 | Clean Windows leftover files out of the project | Only hits projects copied over from Windows |
| 4 | Make the VSCode extension see your installed setup | The sneakiest pitfall in the whole article, and the one that stalls people longest |
Step 0: Install the eim tool first
eim stands for ESP-IDF Manager, Espressif’s official install and management tool. Its advantage over the old install.sh is that you can install multiple ESP-IDF versions side by side without conflicts. To install it, you first add a Homebrew tap (a third-party software source), then install:
Official EIM installation guide: https://dl.espressif.com/dl/eim/index.html
brew tap espressif/eim
brew install eim
The first time I ran brew install eim, I got this prompt:
Error: Refusing to load formula espressif/eim/eim from untrusted tap espressif/eim.
Run `brew trust --formula espressif/eim/eim` or `brew trust espressif/eim` to trust it.
This isn’t an install failure—it’s a Homebrew security check. Recent Homebrew versions don’t automatically trust third-party taps (sources outside the official repo). The first time you use anything from a third-party tap, you get this prompt asking you to confirm whether to trust it. The espressif tap is official, so trust it without worry:
brew trust espressif/eimAfter running that, run brew install eim again and it’ll install normally. If right before brew install you see a long list of packages that have nothing to do with eim (menu-bar tools, AI renaming tools, whatever), that’s just Homebrew listing things like “here’s how many of your packages are outdated”—ignore it and scroll down to the actual error line.
Once installed, verify:
eim --versionIf it prints a version number cleanly, this step is done and you can move on to actually installing ESP-IDF.
Step 1: Install ESP-IDF v6.0.2 with EIM
With the tool installed, one command installs ESP-IDF:
HTTPS_PROXY=http://127.0.0.1:7890 \
HTTP_PROXY=http://127.0.0.1:7890 \
ALL_PROXY=socks5://127.0.0.1:7890 \
eim install -i v6.0.2 -t esp32s3 -n true \
  --idf-mirror https://git.espressif.com.cn \
  --pypi-mirror https://pypi.mirrors.ustc.edu.cn/simple
What each flag means:
-i v6.0.2: the version to install, must include thevprefix—more on why below;-t esp32s3: the target chip;-n true: non-interactive mode, otherwise it stalls on terminal prompts waiting for you to press Enter;--idf-mirror/--pypi-mirror: domestic mirrors—source goes through Espressif’s official China mirror, Python packages go through the USTC mirror; drop them if you don’t need them;- The three
PROXYenv vars: for EIM’s internal git access—also explained in trap 1 below.
The command looks simple, but on the first run I hit two traps—both the “looks like it’s installing normally while quietly taking a detour inside” kind.
Trap 1: Proxy set in git config doesn’t work, EIM ignores it
EIM internally uses Rust’s gix library to pull the IDF source. That library doesn’t respect the traditional git config --global http.proxy setting—it only looks at the HTTPS_PROXY, HTTP_PROXY, and ALL_PROXY system env vars. If your proxy is only set in git’s config file without corresponding env vars, gix tries a direct connection, repeatedly fails during the fetch, and your log fills up with stuff like:
WARN - Attempt N failed: "Failed to fetch: Failed to consume the pack sent by the remote"After three failures, gix automatically falls back to the system’s built-in git (which does respect git config and goes through the proxy fine), so you’ll probably still end up with a successful install—just a few wasted minutes, and the “fallback” clone state isn’t super clean. The easier path is to put the proxy env vars right in the command from the start, so gix succeeds on the first try without needing three failures to trigger a fallback.
Trap 2: Version number without v fails
The release tags in Espressif’s official repo are all in v6.0.2 format with the v. EIM’s -i argument is used directly as a git tag name. If you write -i 6.0.2 (no v), you’ll get:
fatal: Remote branch 6.0.2 not found in upstream originThis error is actually reported by the system git taking over after gix fails—git can’t find a branch called 6.0.2 (without v) on the remote. Writing -i v6.0.2 works fine. If you’re not sure how a given version’s tag is formatted, check what’s on the remote first:
git ls-remote --tags https://git.espressif.com.cn/espressif/esp-idf.git 'v6.0*'Verifying the install
eim list
# should see v6.0.2 (selected)

source ~/.espressif/tools/activate_idf_v6.0.2.sh
idf.py --version
# outputs ESP-IDF v6.0.2 → installed successfully
Where everything lives after install
EIM’s directory layout differs a bit from the traditional approach. All later config references these paths, so get familiar with them first:
IDF source           ~/.espressif/v6.0.2/esp-idf
Toolchain            ~/.espressif/tools/
Python venv          ~/.espressif/tools/python/v6.0.2/venv
Activation script    ~/.espressif/tools/activate_idf_v6.0.2.sh
EIM install manifest ~/.espressif/tools/eim_idf.json
Worth flagging: the Python venv lives in tools/python/v6.0.2/venv—not the python_env/ at the project root that older versions used. Easy to get lost the first time you look for it.
Step 2: Install the ESP-IDF extension in VSCode
With the command-line side done, head back to VSCode, open the extensions panel (Cmd+Shift+X), and search for “ESP-IDF”.
A lot of people install the wrong one here—double-check the publisher. Search results will surface several plugins with similar names and near-identical icons. Going by name alone is an easy way to click the wrong one. Cross-check these fields and only click Install once they all match:
| Field | Value |
|---|---|
| Extension name | ESP-IDF |
| Publisher | Espressif Systems |
| Publisher homepage | espressif.com |
| Installs | 1,582,039 |
| Rating | 145 reviews |
| Description | Develop and debug applications for Espressif chips with ESP-IDF |
Verify the extension by its publisher, not just by name. The publisher line must read Espressif Systems, the domain is espressif.com, and installs are in the millions—those are the obvious tells of the official plugin. Install the wrong one and the config keys from step 4 (idf.eimIdfJsonPath, idf.currentSetup, etc.) may not exist at all, or behave completely differently—debugging gets weird fast, and the underlying cause is simply that you installed the wrong plugin from the start.
After installing, restart VSCode (or Cmd+Shift+P → Reload Window) so the plugin takes effect, then continue.
Step 3: If the project came from Windows, clean up three files first
If your project is brand new, skip this step entirely. But if it’s a project copied over from a Windows machine, you’ll almost certainly hit this section—three files hide Windows-specific paths that break the moment they land on macOS.
① .vscode/settings.json
Replace the C:\... Windows paths, serial port names (like COM22), and old version numbers with the actual macOS values:
{
  "idf.espIdfPath": "/Users/shawn/.espressif/v6.0.2/esp-idf",
  "idf.toolsPath":  "/Users/shawn/.espressif",
  "idf.pythonInstallPath": "/Users/shawn/.espressif/tools/python/v6.0.2/venv/bin/python",
  "idf.port": "/dev/cu.usbmodemXXXXXXXXXXX",
  "idf.customExtraVars": { "IDF_TARGET": "esp32s3" },
  "idf.flashType": "UART"
}
To find your own serial device name:
ls /dev/cu.usb*② .vscode/c_cpp_properties.json
The compilerPath likely points to a Windows version of xtensa-esp32s3-elf-gcc.exe, and the toolchain version is probably outdated too. Swap it for the version actually installed on your Mac. Don’t hardcode the path—reference it via the toolsPath variable so future upgrades don’t require edits:
"compilerPath": "${config:idf.toolsPath}/tools/xtensa-esp-elf/esp-15.2.0_20251204/xtensa-esp-elf/bin/xtensa-esp32s3-elf-gcc"The esp-15.2.0_20251204 version segment isn’t a random copy-paste—go look in ~/.espressif/tools/xtensa-esp-elf/ and check which folder is actually installed, then fill that in.
③ dependencies.lock — the easiest one to miss
This is a lock file generated by idf-component-manager (the component manager). On Windows it was generated in the old v2.0.0 format, which records the absolute paths of local components—like the original author’s directory:
espressif/esp_lcd_touch:
  source:
    path: C:\Users\PC\Desktop\...\espressif__esp_lcd_touch
    type: local
When you run reconfigure on macOS, that path obviously doesn’t exist, and you’ll see:
CMake Error: The "path" field in the manifest file ... does not point to a directory.This file is essentially an auto-generated cache—safest to just delete it and let it rebuild:
rm dependencies.lock
rm -rf build
source ~/.espressif/tools/activate_idf_v6.0.2.sh
idf.py reconfigure
After regenerating, it switches to the v3.0.0 format, paths localize properly, and registry components get re-downloaded into managed_components/.
At this point, idf.py build on the command line should be working. If it still doesn’t, the problem isn’t in these files—look elsewhere.
Step 4: The VSCode extension says “setup not found” (the part that actually stalls people)
After the command line was fully working, I thought I was done. Then I opened VSCode and the status bar just kept showing:
Current ESP-IDF setup is not found.I reloaded the window twice and tweaked several config keys that looked relevant—nothing. Eventually I dug into the extension’s source (dist/extension.js) and figured out the full logic it uses to find a setup:
- Read the list of installed setups from the
eim_idf.jsonfile pointed to byidf.eimIdfJsonPath; - Match the value of
idf.currentSetupagainst that list by path; - If no match, iterate through the whole list to see if any setup can be verified;
- If everything fails, it reports “not found”.
For this logic to work at all, the list from step 1 has to load first. I took two detours to find the root cause—the first one was wasted effort and you don’t need to follow it, the second is the actual fix. Spelling that out up front so you don’t second-guess yourself while working through the article:
- Detour one: no action needed, just understand the principle—feel free to skip;
- Detour two: action required, this is the actual fix.
Detour one (skip it, just for context): what idf.currentSetup should actually contain
The official description for this config key reads “Current ESP-IDF setup id in eim_idf.json path”, which sounds like it wants an ID (a number). But looking at the source, when the extension picks a setup itself, what it actually writes in is:
await _o("idf.currentSetup", c.idfPath, ConfigurationTarget.WorkspaceFolder, e)What gets written is idfPath—a path, not an ID. So if this key shows up in your workspace config, it should look like:
"idf.currentSetup": "/Users/shawn/.espressif/v6.0.2/esp-idf"But you don’t need to manually edit this—it’s not the root cause. As long as the setup list from detour two loads correctly, the extension will iterate, find the only installed v6.0.2, and write the path back into currentSetup itself—that part is the extension’s job. I’m only including this to explain the principle, so when you see this field you know what it does. Don’t manually edit it just because it “looks wrong.” The thing you actually need to fix is below.
Detour two (the actual fix): idf.eimIdfJsonPath is in the wrong scope
VSCode config keys have different scopes, and idf.eimIdfJsonPath has scope application—meaning it only takes effect in the global User settings.json. Writing it inside the project’s own .vscode/settings.json does nothing at all.
I had been keeping eimIdfJsonPath in the project’s workspace config all along, which meant the extension could never load the eim_idf.json file, and the setup list from step 1 was always empty. An empty list means no matter how currentSetup is set, nothing matches—that’s the real reason my first two reloads didn’t fix anything.
The fix: move
idf.eimIdfJsonPathinto the global config file.
On macOS, VSCode’s global config file lives at:
~/Library/Application Support/Code/User/settings.jsonOpen it in your editor and add this line:
"idf.eimIdfJsonPath": "/Users/shawn/.espressif/tools/eim_idf.json"In the workspace’s .vscode/settings.json, keep only idf.currentSetup (set to the IDF path). Whatever you do, don’t also put eimIdfJsonPath in the workspace config—it won’t take effect there, and it’ll only fool you into thinking you’ve configured it correctly.
After the change, open the command palette with Cmd+Shift+P and pick Reload Window. Once the reload finishes, the status bar should properly show the ESP-IDF version and target chip—that means the extension finally sees it.
If issues persist after Reload, check the extension’s own live log: Cmd+Shift+P → Output, then in the dropdown at the top-right of the output panel, pick the ESP-IDF channel. The errors there are far more detailed than the one-liner in the status bar.
Not sure about a config key’s scope? Just look it up, don’t guess
VSCode extensions declare their scope info in their own package.json. Rather than guess, write a few lines of script and check it directly:
python3 -c "
import json
p = json.load(open('/Users/shawn/.vscode/extensions/espressif.esp-idf-extension-2.1.0/package.json'))
cfg = p['contributes']['configuration']
props = {}
if isinstance(cfg, list):
    for c in cfg:
        props.update(c.get('properties', {}))
else:
    props = cfg.get('properties', {})
for k in ['idf.eimIdfJsonPath', 'idf.currentSetup', 'idf.espIdfPath']:
    print(k, '->', props.get(k, {}).get('scope', 'window (default)'))
"
Quick Reference
Where each config key belongs
| Config key | Scope | Where to write it |
|---|---|---|
idf.eimIdfJsonPath |
application | Global User settings |
idf.currentSetup |
resource | Workspace .vscode/settings.json |
idf.espIdfPath / idf.toolsPath / idf.pythonInstallPath |
window | Either workspace or global is fine |
Key paths
IDF source           ~/.espressif/v6.0.2/esp-idf
Toolchain            ~/.espressif/tools/
xtensa gcc           ~/.espressif/tools/xtensa-esp-elf/esp-15.2.0_20251204/xtensa-esp-elf/bin/xtensa-esp32s3-elf-gcc
Python venv          ~/.espressif/tools/python/v6.0.2/venv/bin/python
Activation script    source ~/.espressif/tools/activate_idf_v6.0.2.sh
EIM install manifest ~/.espressif/tools/eim_idf.json
Global settings      ~/Library/Application Support/Code/User/settings.json
Common commands
brew tap espressif/eim                              # add the official tap
brew trust espressif/eim                             # trust required on first use of a third-party tap
brew install eim                                     # install eim itself

eim list                                              # list installed versions
eim install -i v6.0.2 -t esp32s3 -n true ...          # install ESP-IDF (see step 1 for flags)

source ~/.espressif/tools/activate_idf_v6.0.2.sh      # activate ESP-IDF env in the current shell
idf.py set-target esp32s3                             # set the target chip
idf.py reconfigure                                    # run only the cmake configure step, generates compile_commands.json
idf.py build                                          # build
idf.py -p /dev/cu.usbmodemXXXX flash monitor          # flash and open the serial monitor
Triage order: when you’re stuck, narrow things down this way
If you don’t know where to start, eliminate possibilities in this order—it’s much faster than guessing:
- Can
brew install eiminstall? If not, check whether the prompt is asking forbrew trust—if so, just trust it, see step 0; - Can
idf.py --versionrun? If not → the problem is at the install or activation layer, see step 1; - Are the search results in the VSCode extensions panel right? If after install the config keys don’t line up, or the plugin’s behavior doesn’t match what this article describes → first confirm the publisher is Espressif Systems; you probably installed the wrong plugin from the start, see step 2;
- Can
idf.py reconfigurecomplete? If not → the problem is in project files, focus ondependencies.lock, see step 3; - Command line is all fine, but VSCode reports setup not found? → The problem is extension config, focus on the scope of
eimIdfJsonPath, see step 4.
Two easy wrong directions worth flagging up front, to save you the wasted effort:
- The v6.0.2 tag doesn’t ship with a
version.txtfile. That’s not a missed file from the clone—the extension doesn’t read this file anyway, so don’t panic when you see it missing; - The value of
idf.currentSetupis almost never the root cause of “setup not found”. When you hit this error, don’t rush to change it—first confirm thateimIdfJsonPathis in the global settings rather than the workspace config.
If you’ve followed along and you’re still stuck, it’s almost certainly a version mismatch—ESP-IDF’s install method and the VSCode extension’s setup-detection logic have both changed multiple times over the past few years, and old tutorials may not apply to new versions. I’d suggest taking your actual ESP-IDF version, EIM version, extension version, and the specific error message, and handing them to an AI along with this article, then tracing through the four-step “install tool → install IDF → clean project files → configure extension” framework. That usually pinpoints the broken layer faster than searching the error keywords directly.
