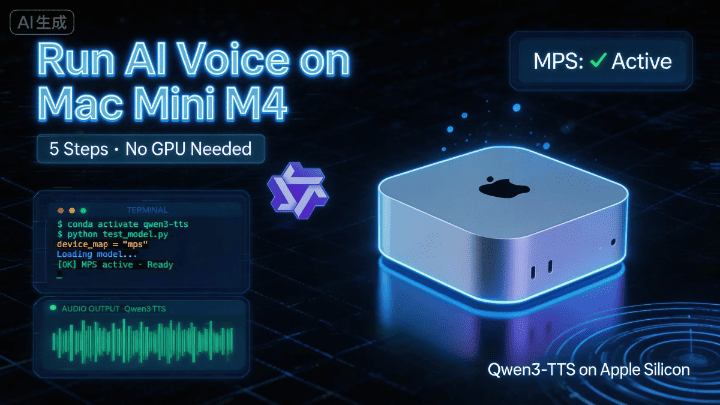
Complete Guide to Running Qwen3-TTS on Mac Mini M4 | From Zero to Hero in 5 Steps
Qwen3-TTS is Alibaba's latest text-to-speech model, but it's designed for NVIDIA GPUs by default. This guide walks you through running it successfully on a Mac Mini M4—from installing system dependencies and setting up Python, to adapting the code for Apple GPU (MPS). Perfect for Mac users, AI beginners, and developers who want to try out TTS models.
Complete Guide to Running Qwen3-TTS on Mac Mini M4
Who is this for? Anyone with a Mac Mini M4 who can open Terminal. No AI background needed—just follow along!
📝 This guide is based on the author’s actual testing on a Mac Mini M4. All steps have been verified to work.
📋 Before We Begin
Qwen3-TTS is Alibaba’s latest text-to-speech model, and it performs impressively well. However, it’s designed for NVIDIA GPUs by default, so running it on a Mac requires a few small adjustments.
The good news: not many changes needed, and I’ve already worked through all the pitfalls for you 🎉
The entire process takes 5 steps, approximately 15–30 minutes (most of which is spent waiting for the model to download).
Step 1: Install System Dependencies
macOS is missing some audio processing tools. Let’s install them using Homebrew.
Open Terminal and paste the following command:
brew install portaudio ffmpeg sox⚠️ If you skip this step, you’ll get an error
/bin/sh: sox: command not foundlater. You can come back then, but it’s better to get it done now.
Step 2: Set Up a Python Environment
Pick a directory for your project, then use Conda to create a clean Python 3.12 environment to avoid conflicts with other projects on your system.
# Create and activate the environment (only need to do this once)
conda create -n qwen3-tts python=3.12 -y
conda activate qwen3-tts

# Install core libraries
pip install -U qwen-tts

# Clone the official repository
git clone https://github.com/QwenLM/Qwen3-TTS.git
cd Qwen3-TTS
pip install -e .
💡 What’s a Conda environment? Think of it as a “separate room” where all this project’s dependencies live. They won’t interfere with other programs on your computer.
Step 3: Adapt the Code for M4 Chip ⭐ (Crucial!)
Up to this point, everything matches the GitHub instructions. But if you’re using a Mac with an M-series chip, things get a bit different from here.
This is where Mac users最容易 encounter issues. The official script assumes NVIDIA GPUs, so we need to modify two places to use Apple’s GPU (MPS) instead.
Open the file examples/test_model_12hz_base.py, find around line 50, and make these two changes:
Change A: Specify MPS as the device
# ❌ Original code (designed for NVIDIA)
# tts = Qwen3TTSModel.from_pretrained(..., attn_implementation="flash_attention_2")

# ✅ Change to this (adapted for Mac M4)
tts = Qwen3TTSModel.from_pretrained(
    "Qwen/Qwen3-TTS-12Hz-1.7B-Base",   # Note: removed trailing slash /
    torch_dtype=torch.bfloat16,          # M4 fully supports bfloat16, balancing precision and speed
    attn_implementation="sdpa",          # Mac-compatible attention mechanism, replaces flash_attention_2
    device_map="mps",                    # Force Apple GPU usage
)
Change B: Adapt synchronization for MPS
# ❌ Original code (NVIDIA only, will crash on Mac)
# torch.cuda.synchronize()

# ✅ Change to this (auto-detect which GPU to use)
if torch.cuda.is_available():
    torch.cuda.synchronize()
elif torch.backends.mps.is_available():
    torch.mps.synchronize()   # Correct command for Mac
🔧 Why make these changes? The M4 chip uses Apple’s own Metal framework (MPS), which is completely different from NVIDIA’s CUDA. The first change tells the model “use Apple GPU,” and the second ensures the sync wait command uses the correct Apple version.
Step 4: Download and Run the Model
The model file is approximately 4 GB, so make sure you have a stable internet connection.
cd examples
python test_model_12hz_base.py
🐢 Download is too slow? Try a mirror
export HF_ENDPOINT=https://hf-mirror.com
python test_model_12hz_base.py
If ❌ you get a SafetensorError?
This means the previous download was interrupted and the file is corrupted. The solution is simple:
- Open Finder and go to
~/.cache/huggingface/hub - Delete the
Qwenfolder - Re-run the script to re-download
Step 5: Verify the GPU is Working
Before running, you can quickly confirm that the M4’s GPU is recognized correctly:
import torch
print(torch.backends.mps.is_available())  # If True, you're all set ✅
🎉 Success!
If everything goes well, after running the script, a new folder will be created in the examples/ directory containing the generated audio files.
📎 Complete Reference Code
Below is the full code with all Mac adaptations, plus multi-language merged output and speed control features. You can save it as a .py file and use it directly:
import os
import torch
import soundfile as sf
import numpy as np
# Ensure 'qwen_tts' is installed/present in the environment
from qwen_tts import Qwen3TTSModel

# ================= 1. Initialization (Setup) =================

# Auto-detect the hardware.
# "mps" = Mac (Apple Silicon), "cuda" = NVIDIA GPU, "cpu" = Standard Processor
if torch.backends.mps.is_available():
    device = "mps"   # Mac M1/M2/M3/M4...
elif torch.cuda.is_available():
    device = "cuda"  # NVIDIA GPU
else:
    device = "cpu"   # Standard CPU

print(f"Using device: {device}")

# Define where to save the results
OUT_DIR = "qwen3_slow_output"
os.makedirs(OUT_DIR, exist_ok=True)

print("Loading model... (This might take a minute)")

# Loading the model from Hugging Face
model = Qwen3TTSModel.from_pretrained(
    "Qwen/Qwen3-TTS-12Hz-1.7B-Base",
    torch_dtype=torch.bfloat16,
    attn_implementation="sdpa",
    device_map=device,
)
print("Model loaded successfully!")

# ================= 2. Reference Audio Settings =================
# This is the voice the model will mimic (clone).

# Option A: Use a URL (Official Qwen Example)
ref_audio_url = "https://qianwen-res.oss-cn-beijing.aliyuncs.com/Qwen3-TTS-Repo/clone_2.wav"

# Option B: Use a local file (Uncomment the line below to use your own file)
# ref_audio_url = "./my_voice.wav"

# CRITICAL: This text MUST match what is said in the reference audio exactly.
# If this is wrong, the quality will be bad.
ref_text_content = "Okay. Yeah. I resent you. I love you. I respect you. But you know what? You blew it! And thanks to you."

# ================= 3. Content to Generate =================
# Tip: To make the speech slower and clearer, we add punctuation (like , . ...)
# This forces the model to pause between words.

segments = [
    {
        "lang": "Chinese",
        # Original: 大家好...
        # Trick: Added commas to slow it down.
        "text": "大家好,这个视频是,分享如何在Mac Mini上,部署Qwen.3-TTS,运行官方例子程序,希望你们喜欢。",
        "temp": 0.7,
    },
    {
        "lang": "English",
        # Original: This video is about...
        # Trick: Added "..." and extra commas for a relaxed pace.
        "text": "Hello everyone! In this video, I'll share how to deploy Qwen.3-TTS on a Mac Mini and run the official demos. I hope you enjoy it.",
        "temp": 0.7,
    },
    {
        "lang": "Japanese",
        # Trick: Added extra Japanese commas (、)
        "text": "皆さん、こんにちは。この動画では、Mac MiniでQwen.3-TTSを導入し、公式デモを動かす方法をシェアします。気に入っていただけると嬉しいです。",
        "temp": 0.7,
    },
    {
        "lang": "Korean",
        # Trick: Added breaks between concepts.
        "text": "안녕하세요 여러분. 이번 영상에서는 맥 미니(Mac Mini)에 Qwen.3-TTS를 구축하고, 공식 예제를 실행하는 방법을 공유해 드리겠습니다. 유익한 시간이 되시길 바랍니다.",
        "temp": 0.7,
    },
    {
        "lang": "German",
        "text": "Hallo zusammen! In diesem Video zeige ich euch, wie man Qwen.3-TTS auf einem Mac Mini deployt und die offiziellen Demos ausführt. Ich hoffe, es gefällt euch.",
        "temp": 0.6,
    },
    {
        "lang": "French",
        "text": "Bonjour à tous ! Dans cette vidéo, je vais partager comment déployer Qwen.3-TTS sur un Mac Mini et lancer les démos officielles. J'espère qu'elle vous plaira.",
        "temp": 0.8,
    }
]

# ================= 4. Generation Loop =================
all_audio_parts = []
final_sr = None # Sample rate

print("Starting audio generation...")

for i, seg in enumerate(segments):
    print(f"[{i+1}/{len(segments)}] Generating {seg['lang']} segment...")

    # Try to use the 'speed' parameter if the model supports it
    try:
        wavs, sr = model.generate_voice_clone(
            text=seg['text'],
            language=seg['lang'],
            ref_audio=ref_audio_url,
            ref_text=ref_text_content,
            temperature=seg['temp'],
            speed=0.85,  # 0.85 = 85% speed (Slower)
        )
    except TypeError:
        # If 'speed' causes an error, remove it and just use the text tricks
        print(f"  (Note: Speed parameter not supported, using standard speed for {seg['lang']})")
        wavs, sr = model.generate_voice_clone(
            text=seg['text'],
            language=seg['lang'],
            ref_audio=ref_audio_url,
            ref_text=ref_text_content,
            temperature=seg['temp'],
        )

    # Process the audio data
    audio_data = wavs[0]
    if isinstance(audio_data, torch.Tensor):
        audio_data = audio_data.cpu().numpy()

    all_audio_parts.append(audio_data)
    if final_sr is None: final_sr = sr

# ================= 5. Merging Audio =================
print("Merging all segments...")

# Create a silence gap between languages
# For better listening experience, duration is set to 0.3s (adjust as needed)
silence_duration = 0.3
silence_samples = int(silence_duration * final_sr)
silence_data = np.zeros(silence_samples, dtype=np.float32)

final_sequence = []
for part in all_audio_parts:
    final_sequence.append(part)
    final_sequence.append(silence_data) # Add silence after each part

# Remove the very last silence block
if final_sequence:
    final_sequence.pop()

full_audio = np.concatenate(final_sequence)

# ================= 6. Save Output =================
final_path = os.path.join(OUT_DIR, "Final_Slow_Mix.wav")
sf.write(final_path, full_audio, final_sr)

print("="*30)
print(f"Done! Audio saved to:\n{final_path}")
print("="*30)
🛠️ Quick Troubleshooting Guide
| Symptom | Cause | Solution |
|---|---|---|
sox: command not found | Missing system dependencies | Run brew install from Step 1 |
SafetensorError | Model file download interrupted | Delete ~/.cache/huggingface/hub/Qwen and retry |
torch.cuda crash error | Using NVIDIA-specific commands | Check if Change B in Step 3 was applied |
| Download slow / timeout | HuggingFace access restricted | Set mirror and retry |
| Weird driver errors | Occasional Apple Silicon driver issues | Restart your computer - fixes 90% of odd issues |