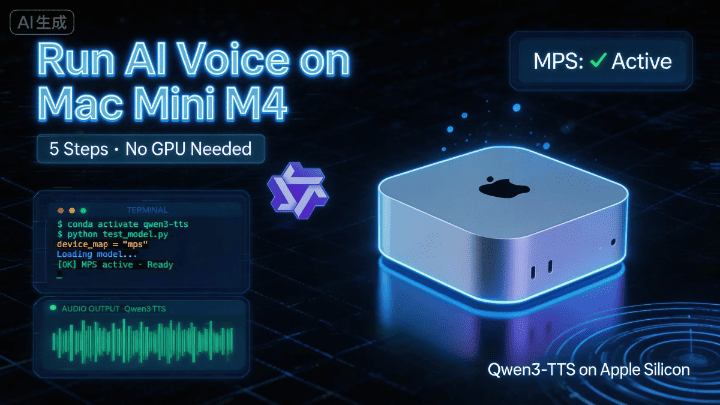
在 Mac Mini M4 上跑 Qwen3-TTS 完全指南|從零開始,5步搞定
Qwen3-TTS 是阿里巴巴最新的文字轉語音模型,但官方預設是為 NVIDIA 顯卡設計的。本文手把手教你在 Mac Mini M4 上成功運行——從安裝系統依賴、配置 Python 環境,到修改代碼適配 Apple GPU(MPS),每一步都有詳細說明。適合 Mac 用戶、AI 新手,以及想嘗試 TTS 模型的開發者。
在 Mac Mini M4 上跑 Qwen3-TTS 完全指南
寫給誰看的? 只要你有一台 Mac Mini M4,會開終端機,這篇就是為你寫的。不需要 AI 背景,跟著做就行!
📝 本文基於作者在 Mac Mini M4 上的實測,所有步驟均驗證可行。
📋 開始之前,先看這裡
Qwen3-TTS 是阿里巴巴最新發布的文字轉語音模型,效果非常不錯。但它預設是為 NVIDIA 顯卡寫的,放到 Mac 上跑需要做幾處小改動。
好消息是:改動不多,而且本文已經幫你踩完坑了 🎉
整個流程分 5 步,大約需要 15~30 分鐘(大部分時間在等模型下載)。
------
第一步:安裝系統依賴
Mac 自帶的系統缺少一些音訊處理工具,先用 Homebrew 補上。
打開終端機,貼上以下指令:
brew install portaudio ffmpeg sox⚠️ 如果跳過這步,後面運行時會報錯
/bin/sh: sox: command not found,那時候再回來裝也來得及,但不如現在一次搞定。
第二步:建立 Python 環境
找一個存放專案的目錄,然後用 Conda 建立一個乾淨的 Python 3.12 環境,避免跟系統裡其他專案打架。
# 建立並啟動環境(只需做一次)
conda create -n qwen3-tts python=3.12 -y
conda activate qwen3-tts

# 安裝核心函式庫
pip install -U qwen-tts

# 下載官方倉庫
git clone https://github.com/QwenLM/Qwen3-TTS.git
cd Qwen3-TTS
pip install -e .
💡 什麼是 Conda 環境? 可以把它理解成一個「獨立小房間」,這個專案的所有依賴都裝在裡面,不會影響你電腦上的其他程式。
第三步:修改代碼適配 M4 晶片 ⭐(重點!)
之前的步驟,跟 Github 的步驟是一樣的,但如果你用的是 Mac M 系列晶片的從這裡開始會有點不一樣。
這是 Mac 用戶最容易踩坑的地方。官方腳本預設用 NVIDIA 顯卡,我們要改兩處讓它用 Apple 的 GPU(MPS)。
打開檔案 examples/test_model_12hz_base.py,找到大約第 50 行,做以下兩處修改:
修改 A:指定裝置為 MPS
# ❌ 原來的寫法(為 NVIDIA 設計)
# tts = Qwen3TTSModel.from_pretrained(..., attn_implementation="flash_attention_2")

# ✅ 改成這樣(適配 Mac M4)
tts = Qwen3TTSModel.from_pretrained(
    "Qwen/Qwen3-TTS-12Hz-1.7B-Base",   # 注意:去掉末尾的斜線 /
    torch_dtype=torch.bfloat16,          # M4 完整支援 bfloat16,精度與速度兼顧
    attn_implementation="sdpa",          # Mac 相容的注意力機制,替代 flash_attention_2
    device_map="mps",                    # 強制使用 Apple GPU
)
修改 B:同步指令適配 MPS
# ❌ 原來的寫法(僅限 NVIDIA,在 Mac 上會直接報錯崩潰)
# torch.cuda.synchronize()

# ✅ 改成這樣(自動判斷用哪種 GPU)
if torch.cuda.is_available():
    torch.cuda.synchronize()
elif torch.backends.mps.is_available():
    torch.mps.synchronize()   # Mac 專用的正確指令
🔧 為什麼要改這兩處? M4 晶片用的是蘋果自己的 Metal 框架(MPS),跟 NVIDIA 的 CUDA 是兩套不同的體系。第一處告訴模型「用蘋果 GPU」,第二處讓同步等待指令也用正確的蘋果版本。
第四步:下載模型並運行
模型檔案大約 4 GB,請確保網路穩定。
cd examples
python test_model_12hz_base.py
🐢 下載太慢?試試鏡像源
export HF_ENDPOINT=https://hf-mirror.com
python test_model_12hz_base.py
如果 ❌ 報錯 SafetensorError?
這說明上次下載中途斷了,檔案損壞。解決方法很簡單:
- 打開 Finder,前往
~/.cache/huggingface/hub - 刪除
Qwen資料夾 - 重新執行腳本,讓它重新下載
第五步:驗證 GPU 是否在工作
運行前可以快速確認一下 M4 的 GPU 是否被正確識別:
import torch
print(torch.backends.mps.is_available())  # 輸出 True 就大功告成 ✅
🎉 成功了!
如果一切正常,腳本運行後會在 examples/ 目錄下生成一個新資料夾,裡面就是生成的音訊檔案。
📎 完整參考代碼
下面這份代碼已經包含所有 Mac 適配修改,還加了多語言合併輸出和語速控制的功能,可以直接存成 .py 檔案使用:
import os
import torch
import soundfile as sf
import numpy as np
# Ensure 'qwen_tts' is installed/present in the environment
# 確保環境中已安裝 'qwen_tts' 或該檔案在目前目錄下
from qwen_tts import Qwen3TTSModel

# ================= 1. Initialization (Setup) / 初始化設定 =================

# Auto-detect the hardware.
# 自動偵測硬體裝置。
# "mps" = Mac (Apple Silicon), "cuda" = NVIDIA GPU, "cpu" = Standard Processor
if torch.backends.mps.is_available():
    device = "mps"   # Mac M1/M2/M3/M4...
elif torch.cuda.is_available():
    device = "cuda"  # NVIDIA GPU / 英偉達顯卡
else:
    device = "cpu"   # Standard CPU / 普通處理器

print(f"Using device / 目前使用裝置: {device}")

# Define where to save the results
# 定義結果儲存路徑
OUT_DIR = "qwen3_slow_output"
os.makedirs(OUT_DIR, exist_ok=True)

print("Loading model... (This might take a minute)")
print("正在載入模型... (可能需要一分鐘)")

# Loading the model from Hugging Face
# 從 Hugging Face 載入模型
model = Qwen3TTSModel.from_pretrained(
    "Qwen/Qwen3-TTS-12Hz-1.7B-Base",
    torch_dtype=torch.bfloat16,
    attn_implementation="sdpa",
    device_map=device,
)
print("Model loaded successfully! / 模型載入完成!")

# ================= 2. Reference Audio Settings / 參考音訊設定 =================
# This is the voice the model will mimic (clone).
# 這是模型將要模仿(克隆)的聲音。

# Option A: Use a URL (Official Qwen Example)
# 選項 A: 使用線上 URL (Qwen 官方示例)
ref_audio_url = "https://qianwen-res.oss-cn-beijing.aliyuncs.com/Qwen3-TTS-Repo/clone_2.wav"

# Option B: Use a local file (Uncomment the line below to use your own file)
# 選項 B: 使用本機檔案 (取消下面這行的註解以使用自己的檔案)
# ref_audio_url = "./my_voice.wav"

# CRITICAL: This text MUST match what is said in the reference audio exactly.
# If this is wrong, the quality will be bad.
# 關鍵:此文字必須與參考音訊中的說話內容完全一致。
# 如果內容對不上,生成品質會變差。
ref_text_content = "Okay. Yeah. I resent you. I love you. I respect you. But you know what? You blew it! And thanks to you."

# ================= 3. Content to Generate / 生成內容設定 =================
# Tip: To make the speech slower and clearer, we add punctuation (like , . ...)
# This forces the model to pause between words.
# 技巧:為了讓語速更慢、更清晰,我們增加了標點符號(如 , . ...)
# 這會強制模型在詞與詞之間停頓。

segments = [
    {
        "lang": "Chinese",
        # Original: 大家好...
        # Trick: Added commas to slow it down.
        # 技巧:增加逗號以減慢語速。
        "text": "大家好,這個影片是,分享如何在Mac Mini上,部署Qwen.3-TTS,執行官方範例程式,希望你們喜歡。",
        "temp": 0.7,
    },
    {
        "lang": "English",
        # Original: This video is about...
        # Trick: Added "..." and extra commas for a relaxed pace.
        # 技巧:增加 "..." 和額外的逗號,讓節奏更舒緩。
        "text": "Hello everyone! In this video, I'll share how to deploy Qwen.3-TTS on a Mac Mini and run the official demos. I hope you enjoy it.",
        "temp": 0.7,
    },
    {
        "lang": "Japanese",
        # Trick: Added extra Japanese commas (、)
        # 技巧:增加額外的日文逗號 (、)
        "text": "皆さん、こんにちは。この動画では、Mac MiniでQwen.3-TTSを導入し、公式デモを動かす方法をシェアします。気に入っていただけると嬉しいです。",
        "temp": 0.7,
    },
    {
        "lang": "Korean",
        # Trick: Added breaks between concepts.
        # 技巧:在概念之間增加斷句。
        "text": "안녕하세요 여러분. 이번 영상에서는 맥 미니(Mac Mini)에 Qwen.3-TTS를 구축하고, 공식 예제를 실행하는 방법을 공유해 드리겠습니다. 유익한 시간이 되시길 바랍니다.",
        "temp": 0.7,
    },
    {
        "lang": "German",
        "text": "Hallo zusammen! In diesem Video zeige ich euch, wie man Qwen.3-TTS auf einem Mac Mini deployt und die offiziellen Demos ausführt. Ich hoffe, es gefällt euch.",
        "temp": 0.6,
    },
    {
        "lang": "French",
        "text": "Bonjour à tous ! Dans cette vidéo, je vais partager comment déployer Qwen.3-TTS sur un Mac Mini et lancer les démos officielles. J'espère qu'elle vous plaira.",
        "temp": 0.8,
    }
]

# ================= 4. Generation Loop / 生成迴圈 =================
all_audio_parts = []
final_sr = None # Sample rate / 取樣率

print("Starting audio generation... / 開始生成音訊...")

for i, seg in enumerate(segments):
    print(f"[{i+1}/{len(segments)}] Generating {seg['lang']} segment... / 正在生成 {seg['lang']} 片段...")

    # Try to use the 'speed' parameter if the model supports it
    # 嘗試使用 'speed' 參數(如果模型支援)
    try:
        wavs, sr = model.generate_voice_clone(
            text=seg['text'],
            language=seg['lang'],
            ref_audio=ref_audio_url,
            ref_text=ref_text_content,
            temperature=seg['temp'],
            speed=0.85,  # 0.85 = 85% speed (Slower) / 0.85倍速(更慢)
        )
    except TypeError:
        # If 'speed' causes an error, remove it and just use the text tricks
        # 如果 'speed' 參數報錯,則移除它,僅依賴文字標點技巧
        print(f"  (Note: Speed parameter not supported, using standard speed for {seg['lang']})")
        print(f"  (注意:不支援 Speed 參數,{seg['lang']} 將使用標準語速)")
        wavs, sr = model.generate_voice_clone(
            text=seg['text'],
            language=seg['lang'],
            ref_audio=ref_audio_url,
            ref_text=ref_text_content,
            temperature=seg['temp'],
        )

    # Process the audio data / 處理音訊資料
    audio_data = wavs[0]
    if isinstance(audio_data, torch.Tensor):
        audio_data = audio_data.cpu().numpy()

    all_audio_parts.append(audio_data)
    if final_sr is None: final_sr = sr

# ================= 5. Merging Audio / 合併音訊 =================
print("Merging all segments... / 正在合併所有片段...")

# Create a silence gap between languages
# Changed from 0.3s to 0.8s for a better listening experience
# 在語言之間建立靜音間隔
# 為了更好的聽感,時長設定為 0.3秒 (可根據需要調整)
silence_duration = 0.3
silence_samples = int(silence_duration * final_sr)
silence_data = np.zeros(silence_samples, dtype=np.float32)

final_sequence = []
for part in all_audio_parts:
    final_sequence.append(part)
    final_sequence.append(silence_data) # Add silence after each part / 每段後加靜音

# Remove the very last silence block
# 移除最後一段多餘的靜音
if final_sequence:
    final_sequence.pop()

full_audio = np.concatenate(final_sequence)

# ================= 6. Save Output / 儲存輸出 =================
final_path = os.path.join(OUT_DIR, "Final_Slow_Mix.wav")
sf.write(final_path, full_audio, final_sr)

print("="*30)
print(f"Done! Audio saved to: / 完成!音訊已儲存至:\n{final_path}")
print("="*30)
🛠️ 常見問題速查
| 症狀 | 原因 | 解決方法 |
|---|---|---|
sox: command not found | 缺少系統依賴 | 執行第一步的 brew install |
SafetensorError | 模型檔案下載中斷損壞 | 刪除 ~/.cache/huggingface/hub/Qwen 重新下載 |
torch.cuda 報錯崩潰 | 用了 NVIDIA 專屬指令 | 檢查第三步修改 B 是否做了 |
| 下載很慢 / 超時 | 網路存取 HuggingFace 受限 | 設定鏡像源後重試 |
| 莫名其妙的驅動程式報錯 | Apple Silicon 驅動偶發問題 | 重新啟動電腦,能解決 90% 的奇怪問題 |