ESP32-S3 驅動 GC9A01 圓形螢幕 + BMP180 DIY 登山海拔紀錄器完整教學(SPI + I2C + Arduino)
用 ESP32-S3 驅動 GC9A01 1.28 英吋圓形彩屏,搭配 BMP180 氣壓感測器,實作帶動態山景背景、即時海拔、累計爬升與氣壓顯示的登山紀錄器,附完整 Arduino 程式碼與接線說明。
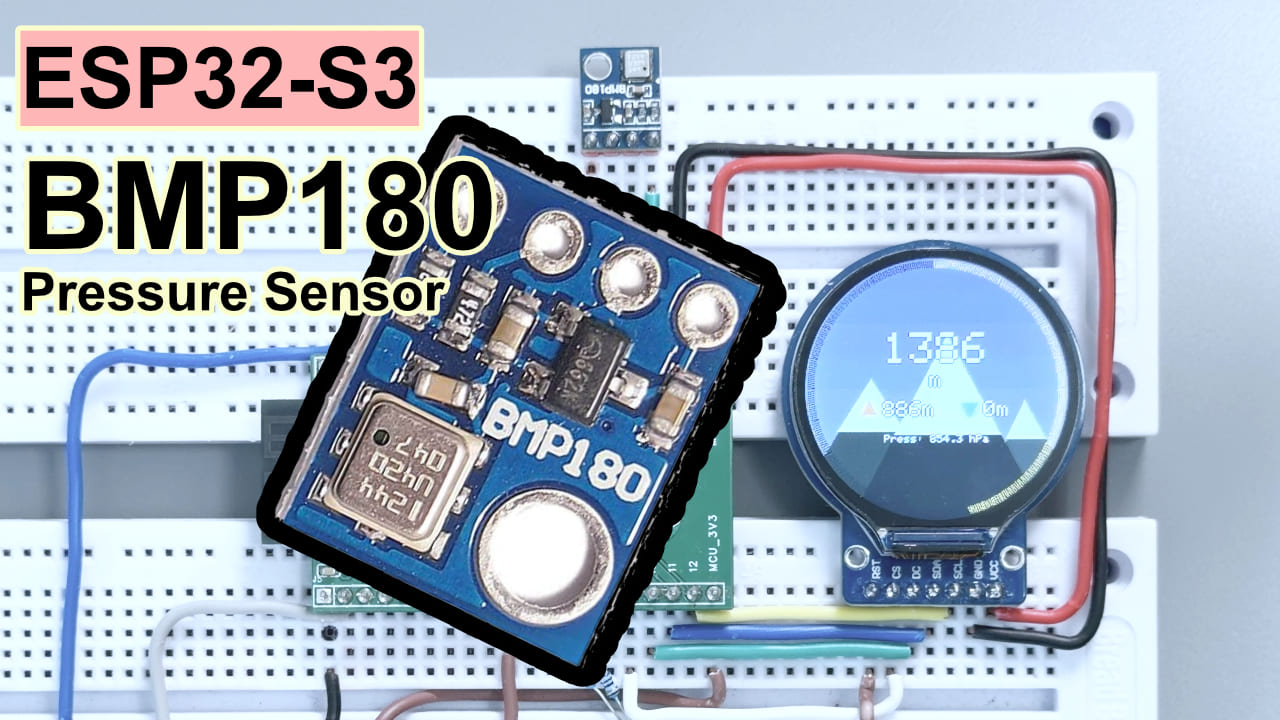
難度:⭐⭐⭐☆☆(焊過幾次杜邦線就能上手) 預估時間:45 分鐘 測試環境:Arduino IDE 2.3.8 · Arduino_GFX_Library v1.6.5 · Adafruit BMP085 Library v1.2.4 · ESP32 Arduino Core 3.3.10
TL;DR(快速上手):
- 接螢幕:GC9A01 → CS/GPIO9、DC/GPIO10、SCK/GPIO12、MOSI/GPIO11、RST/GPIO18、BL/GPIO7
- 接感測器:BMP180 → SDA/GPIO13、SCL/GPIO14
- 背光必須拉高:
setup()裡加digitalWrite(TFT_BL, HIGH),少了這句螢幕永遠是黑的- 安裝兩個函式庫:Arduino_GFX_Library(作者 moononournation)+ Adafruit BMP085 Library
- 直接燒錄,打開序列埠監視窗(115200),看到
初始化完成,進入主迴圈就成功了
前言
我很喜歡爬山,可是最近只能爬爬白雲山,背包裡塞了行動電源、手機、防曬乳,唯獨沒有任何一塊能即時告訴我「你已經爬了多少公尺」的東西。手機 App 要連網,GPS 訊號時好時壞,而且每次掏出手機都有一種「我是來打卡拍照的」的違和感。於是我就打算做一個登山海拔紀錄器。
回來翻零件盒,剛好看到一塊 GC9A01 圓形螢幕長期吃灰——那個圓形輪廓,像極了登山錶的錶盤。再配上 BMP180 氣壓感測器和 ESP32-S3,三個零件,總成本不到 50 塊,做出來的效果比我預期的好太多。
本文目標:從零開始,把這三個零件接在一起,燒錄程式碼,得到一個能即時顯示海拔、累計爬升/下降、氣壓,背景還會隨海拔動態變色的登山紀錄器。跟著做就能重現。
實驗效果
最終效果:GC9A01 圓形螢幕即時顯示當前海拔(m)、累計爬升(橘色向上箭頭)、累計下降(藍色向下箭頭)和即時氣壓,螢幕背景是隨海拔比例動態變色的山景圖——低海拔偏暖棕,高海拔漸層深藍,山頂雪線也會隨海拔升高而向下蔓延。螢幕邊緣有金色進度環追蹤海拔進度,長按 BOOT 鍵 2 秒可歸零重新計算。
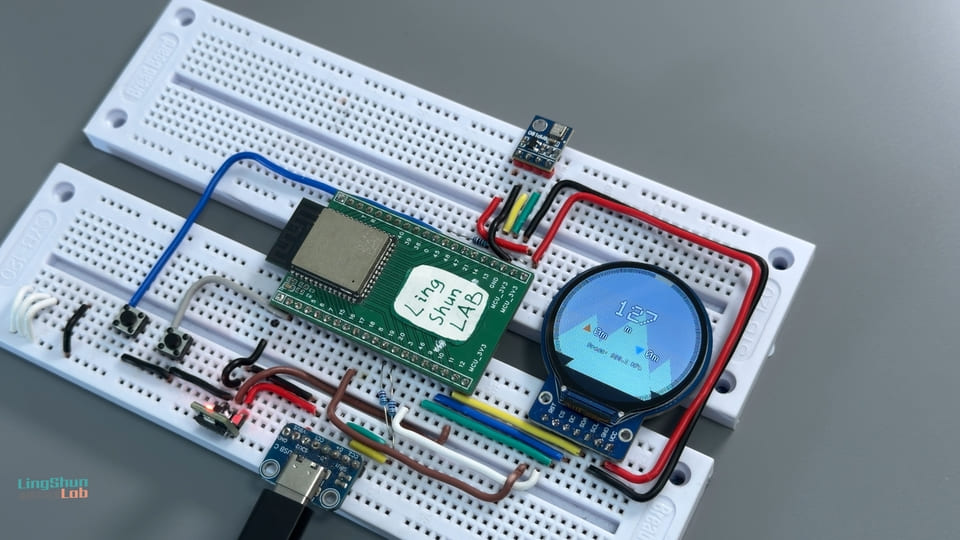
元件說明
ESP32-S3 開發板不用特別介紹,能看到這篇文章代表你用過 ESP32。下面只說另外兩個配角。
BMP180 氣壓感測器
BMP180 是一款 MEMS 氣壓感測器,負責測量大氣壓力並推算海拔高度,用在本專案裡的作用是每秒採集一次氣壓和海拔資料,作為整個儀表板的資料來源。
白話理解:它就像一個隨身攜帶的「氣象站迷你版」——透過測量大氣壓力倒推出你站在多高的地方,原理跟你坐飛機起降時耳朵發悶是一回事:氣壓越低,海拔越高。因為溫度會影響氣壓讀數,它內部還整合了一個溫度感測器幫忙校正,讓海拔資料更準。
| 參數 | 數值 |
|---|---|
| 工作電壓 | 1.8 V ~ 3.6 V(接 3.3 V 即可) |
| 通訊協定 | I2C(固定地址 0x77) |
| 氣壓量程 | 300 ~ 1100 hPa |
| 海拔精度 | 標準模式 ±1 m,高精度模式 ±0.5 m |
| 工作電流 | 待機 0.1 µA;峰值 650 µA(轉換時);1 Hz 平均 3~32 µA(隨精度模式) |
選它的理由:模組便宜、Adafruit 函式庫支援完善、精度對徒步紀錄完全夠用。如果需要更高精度或濕度資料,可以升級到 BMP280 或 BME280,但那就是另一篇文章的事了。
GC9A01 圓形 TFT 彩屏
GC9A01 是 1.28 英吋圓形 TFT 彩屏的驅動 IC,負責接收 SPI 資料並驅動 240×240 像素的圓形顯示面板,用在本專案裡的作用是算繪動態山景背景和即時海拔資料。
白話理解:想像一下智慧手錶的圓形錶盤,就是這個東西。走 SPI 協定通訊,更新速度快,圓形設計用來做儀表板天生合適,配上 Arduino_GFX_Library 的 Canvas 雙緩衝,動畫絲滑不閃爍。
| 參數 | 數值 |
|---|---|
| 螢幕尺寸 | 1.28 英吋(圓形) |
| 解析度 | 240 × 240 像素 |
| 驅動 IC | GC9A01 |
| 通訊介面 | SPI(最高 80 MHz) |
| 工作電壓 | 3.3 V |
| 色深 | 16 位元 RGB565(65536 色) |
選它的理由:圓形螢幕和「登山錶」主題天生契合,直徑剛好夠把海拔大字、爬升/下降指示、進度環全部塞進去,不擁擠。
BOM 表
| 元件 | 型號 / 規格 | 數量 |
|---|---|---|
| 主控開發板 | ESP32-S3(推薦帶 USB-C 的版本) | 1 |
| 氣壓感測器 | BMP180 模組(帶 I2C 上拉電阻的成品模組) | 1 |
| 圓形彩屏 | GC9A01 1.28 吋 TFT,240×240 | 1 |
| 連接線 | 杜邦線(母對母) | 若干 |
| 供電 | USB-C 傳輸線 + 電腦 / 充電頭 | 1 |
元件腳位說明
GC9A01 腳位
| 螢幕腳位 | 功能說明 |
|---|---|
| VCC | 電源正極,接 3.3 V |
| GND | 電源負極 |
| SCL / CLK | SPI 時脈線 |
| SDA / MOSI | SPI 資料線(主→從) |
| CS | 片選(低電位有效) |
| DC | 資料/命令選擇線 |
| RST | 重置(低電位觸發) |
| BL | 背光控制,高電位才亮 |
BMP180 腳位
| 感測器腳位 | 功能說明 |
|---|---|
| VCC | 電源正極,接 3.3 V |
| GND | 電源負極 |
| SCL | I2C 時脈線 |
| SDA | I2C 資料線 |
接線方式
GC9A01 → ESP32-S3
| GC9A01 腳位 | ESP32-S3 GPIO |
|---|---|
| VCC | 3.3 V |
| GND | GND |
| SCL / CLK | GPIO 12 |
| SDA / MOSI | GPIO 11 |
| CS | GPIO 9 |
| DC | GPIO 10 |
| RST | GPIO 18 |
| BL(背光) | GPIO 7 |
BMP180 → ESP32-S3
| BMP180 腳位 | ESP32-S3 GPIO |
|---|---|
| VCC | 3.3 V |
| GND | GND |
| SCL | GPIO 14 |
| SDA | GPIO 13 |
接完線建議逐一核對一遍,能省掉 80% 的除錯時間。 有兩個地方特別容易踩坑:第一,BL(背光)接了 GPIO7 還不夠,程式碼裡也要搭配
digitalWrite(TFT_BL, HIGH)才會亮;第二,GC9A01 的 SCL/SDA 走的是 SPI 協定,BMP180 的 SCL/SDA 走的是 I2C 協定,雖然名字一樣,但它們是兩組完全獨立的匯流排,腳位絕對不能混用。
需要安裝的函式庫
打開 Arduino IDE → 工具 → 管理程式庫,搜尋並安裝以下三個:
| 函式庫名稱 | 作者 | 用途 |
|---|---|---|
| Arduino_GFX_Library | moononournation | GC9A01 螢幕驅動 + Canvas 雙緩衝算繪 |
| Adafruit BMP085 Library | Adafruit | BMP180 / BMP085 氣壓感測器驅動 |
| Adafruit Unified Sensor | Adafruit | 上一個函式庫的相依套件,一起安裝 |
測試通過版本:Arduino_GFX_Library v1.6.5 · Adafruit BMP085 Library v1.2.4 · Arduino IDE 2.3.8 · ESP32 Arduino Core 3.3.10 如果你用的是舊版 ESP32 Core(1.x 系列),部分 SPI 初始化方式略有差異,建議直接升級到 3.x,省得踩坑。
完整程式碼
/*
  ============================================================
  登山海拔紀錄器 (Mountain Altitude Logger)
  ============================================================
  硬體:ESP32-S3 + GC9A01 圓形螢幕(240x240) + BMP180 氣壓感測器
  ============================================================
*/

#include <Arduino_GFX_Library.h>
#include <Wire.h>
#include <Adafruit_BMP085.h>

// ===================== 第一步:腳位與參數定義 =====================
#define TFT_CS    9    // 螢幕片選
#define TFT_DC    10   // 資料/命令選擇
#define TFT_SCK   12   // SPI 時脈
#define TFT_MOSI  11   // SPI 資料(主→從)
#define TFT_RST   18   // 螢幕重置
#define TFT_BL    7    // 背光控制(高電位亮,必須拉高!)
#define TFT_MISO  -1   // 不需要 MISO(只寫螢幕,不讀)

#define BMP_SDA   13   // BMP180 I2C 資料線
#define BMP_SCL   14   // BMP180 I2C 時脈線

#define BTN_PIN   0    // 內建 BOOT 鍵,長按 2 秒歸零校正
#define CALIBRATION_HOLD_MS 2000  // 長按觸發門檻(毫秒)

#define FILTER_SIZE 5     // 滑動平均濾波視窗(取最近 5 個採樣的均值)
#define DEAD_ZONE   0.3f  // 累計爬升/下降的死區(小於 0.3m 的抖動直接忽略)
#define ALT_RANGE_MAX 3000.0f  // 進度環滿圓對應的海拔上限(3000m)

// ===================== 第二步:硬體驅動物件 =====================
Arduino_DataBus *bus = new Arduino_ESP32SPI(TFT_DC, TFT_CS, TFT_SCK, TFT_MOSI, TFT_MISO);
Arduino_GFX *gfx = new Arduino_GC9A01(bus, TFT_RST, 0 /* 旋轉方向 */, true /* IPS 模式 */);
// Canvas 雙緩衝:所有繪圖先寫到記憶體畫布,最後 flush() 一次推到螢幕,消除閃爍
Arduino_Canvas *canvas = new Arduino_Canvas(240, 240, gfx);

Adafruit_BMP085 bmp;

// ===================== 第三步:資料結構 =====================
struct AltitudeData {
  float currentAltitude = 0;       // 當前海拔(濾波後)
  float maxAltitude = 0;           // 本次紀錄的最高海拔
  float totalAscent = 0;           // 累計爬升高度
  float totalDescent = 0;          // 累計下降高度
  float currentPressure = 1013.25; // 當前氣壓(hPa)

  // 以下是用於動畫插值的「顯示值」,讓數字平滑過渡,不突然跳變
  float displayedAltitude = 0;
  float displayedAscent = 0;
  float displayedDescent = 0;
  float displayedPressure = 1013.25;
} data;

// 滑動平均濾波用的環形緩衝區
float altBuffer[FILTER_SIZE] = {0};
int filterIndex = 0;
int filterCount = 0;

// 顏色常數(在 setup() 裡用 color565() 初始化,避免提前佔用資源)
uint16_t COLOR_WHITE, COLOR_BLACK, COLOR_CREAM_GREEN;

// 按鍵狀態
unsigned long btnPressStart = 0;
bool btnIsPressed = false;
bool calibrationTriggered = false;


// ============================================================
//                   模組一:感測器讀取
// ============================================================

void initSensor() {
  Serial.print("[Sensor] 正在初始化 I2C 匯流排 (SDA=");
  Serial.print(BMP_SDA);
  Serial.print(", SCL=");
  Serial.print(BMP_SCL);
  Serial.println(")...");

  Wire.begin(BMP_SDA, BMP_SCL);

  Serial.println("[Sensor] 正在連接 BMP180 感測器...");
  if (!bmp.begin()) {
    // 如果程式卡在這裡一直印 ERROR,代表感測器接線有問題
    // 螢幕也不會亮,因為程式走不到下面去
    while (1) {
      Serial.println("[ERROR] BMP180 初始化失敗!請檢查接線、供電(3.3V)和 I2C 腳位。");
      delay(2000);
    }
  }
  Serial.println("[Sensor] BMP180 連接成功!");
}

// 從 BMP180 讀一次原始氣壓和海拔
void sampleSensor(float &rawAltitude, float &rawPressure) {
  rawPressure = bmp.readPressure() / 100.0f;  // Pa 轉 hPa
  rawAltitude = bmp.readAltitude(101325);      // 101325 Pa = 標準海平面氣壓
}


// ============================================================
//                   模組二:資料處理
// ============================================================

// 滑動平均濾波:把最近 FILTER_SIZE 次讀數平均,降低感測器雜訊
float smoothAltitude(float raw) {
  altBuffer[filterIndex] = raw;
  filterIndex = (filterIndex + 1) % FILTER_SIZE;
  if (filterCount < FILTER_SIZE) filterCount++;

  float sum = 0;
  for (int i = 0; i < filterCount; i++) sum += altBuffer[i];
  return sum / filterCount;
}

// 更新統計資料:最高海拔、累計爬升、累計下降
void updateStats(float smoothedAltitude) {
  static bool firstSample = true;
  static float lastAltitude = 0;

  if (firstSample) {
    lastAltitude = smoothedAltitude;
    data.maxAltitude = smoothedAltitude;
    firstSample = false;
  }

  float delta = smoothedAltitude - lastAltitude;
  // 只統計超過死區的變化,防止平地微小抖動讓爬升數字虛漲
  if (delta > DEAD_ZONE) {
    data.totalAscent += delta;
  } else if (delta < -DEAD_ZONE) {
    data.totalDescent += -delta;
  }

  if (smoothedAltitude > data.maxAltitude) {
    data.maxAltitude = smoothedAltitude;
  }

  lastAltitude = smoothedAltitude;
  data.currentAltitude = smoothedAltitude;
}


// ============================================================
//                   模組三:按鍵與校正
// ============================================================

void showCalibrationFlash();  // 前向宣告

// 長按 BOOT 鍵觸發:歸零爬升/下降,以當前海拔為基準重新開始
void doCalibration() {
  Serial.println("[Button] 偵測到長按,正在執行海拔校正歸零...");
  data.totalAscent = 0;
  data.totalDescent = 0;
  data.displayedAscent = 0;
  data.displayedDescent = 0;
  data.maxAltitude = data.currentAltitude;

  showCalibrationFlash();
  Serial.println("[Button] 校正完成。");
}

// 偵測按鍵狀態,BOOT 鍵低電位有效
void handleButton() {
  bool pressed = (digitalRead(BTN_PIN) == LOW);

  if (pressed && !btnIsPressed) {
    btnIsPressed = true;
    btnPressStart = millis();
    calibrationTriggered = false;
  } else if (pressed && btnIsPressed) {
    // 長按超過門檻且未觸發過,執行校正
    if (!calibrationTriggered && (millis() - btnPressStart >= CALIBRATION_HOLD_MS)) {
      doCalibration();
      calibrationTriggered = true;  // 防止長按期間反覆觸發
    }
  } else if (!pressed && btnIsPressed) {
    btnIsPressed = false;
  }
}


// ============================================================
//                   模組四:UI 算繪
// ============================================================

// RGB565 兩個顏色之間線性插值(t 從 0.0 到 1.0)
uint16_t lerpColor(uint16_t colorA, uint16_t colorB, float t) {
  t = constrain(t, 0.0, 1.0);
  uint8_t r1 = (colorA >> 11) & 0x1F, g1 = (colorA >> 5) & 0x3F, b1 = colorA & 0x1F;
  uint8_t r2 = (colorB >> 11) & 0x1F, g2 = (colorB >> 5) & 0x3F, b2 = colorB & 0x1F;
  uint8_t r = r1 + (r2 - r1) * t;
  uint8_t g = g1 + (g2 - g1) * t;
  uint8_t b = b1 + (b2 - b1) * t;
  return (r << 11) | (g << 5) | b;
}

// 繪製漸層天空背景:低海拔偏暖棕,高海拔漸層深藍
void drawSkyBackground(float altitudeRatio) {
  uint16_t topLow     = canvas->color565(176, 196, 210);  // 低海拔天頂:淡藍
  uint16_t topHigh    = canvas->color565(30, 30, 90);     // 高海拔天頂:深藍
  uint16_t bottomLow  = canvas->color565(210, 200, 180);  // 低海拔地平線:暖灰
  uint16_t bottomHigh = canvas->color565(70, 90, 140);    // 高海拔地平線:藍灰

  uint16_t topColor    = lerpColor(topLow, topHigh, altitudeRatio);
  uint16_t bottomColor = lerpColor(bottomLow, bottomHigh, altitudeRatio);

  for (int y = 0; y < 240; y++) {
    float t = (float)y / 240.0;
    canvas->drawFastHLine(0, y, 240, lerpColor(topColor, bottomColor, t));
  }
}

// 繪製單座山峰(帶雪線),greenFraction 控制雪線位置,海拔越高雪線越低
void drawSnowyPeak(int16_t apexX, int16_t apexY, int16_t baseLeftX, int16_t baseRightX,
                    int16_t baseY, uint16_t bodyColor, float greenFraction) {
  canvas->fillTriangle(apexX, apexY, baseLeftX, baseY, baseRightX, baseY, bodyColor);

  greenFraction = constrain(greenFraction, 0.05f, 0.85f);
  int16_t snowY      = apexY + (baseY - apexY) * greenFraction;
  int16_t snowLeftX  = apexX + (baseLeftX - apexX) * greenFraction;
  int16_t snowRightX = apexX + (baseRightX - apexX) * greenFraction;

  canvas->fillTriangle(apexX, apexY, snowLeftX, snowY, snowRightX, snowY, COLOR_CREAM_GREEN);
}

// 繪製三座遠近錯落的山峰
void drawMountains(float altitudeRatio) {
  float greenRatio = 1.0f - altitudeRatio;  // 海拔越高,植被區域越少,雪線越低

  drawSnowyPeak(60,  110, -20, 140, 240, canvas->color565(60, 75, 65),  greenRatio * 0.7);
  drawSnowyPeak(200, 130, 150, 260, 240, canvas->color565(70, 85, 75),  greenRatio * 0.6);
  drawSnowyPeak(130, 70,  40,  220, 240, canvas->color565(45, 55, 50),  greenRatio);
}

// 繪製一段圓弧(進度環的基礎函式)
void drawRingArc(int16_t cx, int16_t cy, int16_t radius, int16_t thickness,
                  float startDeg, float endDeg, uint16_t color) {
  for (float deg = startDeg; deg <= endDeg; deg += 1.0) {
    float rad = deg * PI / 180.0;
    int16_t x0 = cx + cos(rad) * (radius - thickness / 2);
    int16_t y0 = cy + sin(rad) * (radius - thickness / 2);
    int16_t x1 = cx + cos(rad) * (radius + thickness / 2);
    int16_t y1 = cy + sin(rad) * (radius + thickness / 2);
    canvas->drawLine(x0, y0, x1, y1, color);
  }
}

// 繪製螢幕邊緣的海拔進度環,隨海拔比例點亮金色弧段
void drawProgressRing(float altitudeRatio) {
  int16_t cx = 120, cy = 120, radius = 115, thickness = 6;
  // 先畫一圈灰色底環
  drawRingArc(cx, cy, radius, thickness, -90, 269, canvas->color565(50, 50, 60));
  // 再用金色覆蓋已爬升的進度部分
  float endAngle = -90 + altitudeRatio * 359.0;
  drawRingArc(cx, cy, radius, thickness, -90, endAngle, canvas->color565(255, 200, 80));
}

// 繪製帶黑色描邊的文字,防止白字和淺色背景融在一起看不清
void drawTextWithHalo(int16_t x, int16_t y, const char *text, uint8_t textSize,
                       uint16_t textColor, uint16_t haloColor) {
  canvas->setTextSize(textSize);
  canvas->setTextColor(haloColor);
  // 上下左右各偏移 1 像素畫一遍描邊
  canvas->setCursor(x - 1, y); canvas->print(text);
  canvas->setCursor(x + 1, y); canvas->print(text);
  canvas->setCursor(x, y - 1); canvas->print(text);
  canvas->setCursor(x, y + 1); canvas->print(text);

  canvas->setTextColor(textColor);
  canvas->setCursor(x, y);
  canvas->print(text);
}

// 置中繪製文字,自動根據文字寬度計算偏移
void drawCenteredText(int16_t centerX, int16_t y, const char *text, uint8_t textSize,
                       uint16_t textColor, uint16_t haloColor) {
  canvas->setTextSize(textSize);
  int16_t x1, y1;
  uint16_t w, h;
  canvas->getTextBounds(text, 0, 0, &x1, &y1, &w, &h);
  drawTextWithHalo(centerX - w / 2, y, text, textSize, textColor, haloColor);
}

// 繪製所有資料文字疊加層
void drawDataOverlay() {
  char buf[32];

  // 螢幕中央大字:當前海拔數值
  sprintf(buf, "%d", (int)round(data.displayedAltitude));
  drawCenteredText(120, 68, buf, 4, COLOR_WHITE, COLOR_BLACK);
  drawCenteredText(120, 104, "m", 2, COLOR_WHITE, COLOR_BLACK);

  // 左側:橘色向上三角 + 累計爬升
  int16_t ascX = 58, ascY = 138;
  canvas->fillTriangle(ascX, ascY - 8, ascX - 7, ascY + 5, ascX + 7, ascY + 5,
                       canvas->color565(255, 140, 60));
  sprintf(buf, "%dm", (int)round(data.displayedAscent));
  drawTextWithHalo(ascX + 13, ascY - 7, buf, 2, COLOR_WHITE, COLOR_BLACK);

  // 右側:藍色向下三角 + 累計下降
  int16_t desX = 150, desY = 138;
  canvas->fillTriangle(desX, desY + 8, desX - 7, desY - 5, desX + 7, desY - 5,
                       canvas->color565(120, 180, 255));
  sprintf(buf, "%dm", (int)round(data.displayedDescent));
  drawTextWithHalo(desX + 13, desY - 7, buf, 2, COLOR_WHITE, COLOR_BLACK);

  // 底部小字:即時氣壓
  sprintf(buf, "Press: %.1f hPa", data.displayedPressure);
  drawCenteredText(120, 162, buf, 1, COLOR_WHITE, COLOR_BLACK);
}

// 主算繪函式:依序畫背景 → 山 → 進度環 → 數字,最後 flush 推到螢幕
void renderUI() {
  float altitudeRatio = constrain(data.displayedAltitude / ALT_RANGE_MAX, 0.0f, 1.0f);

  drawSkyBackground(altitudeRatio);
  drawMountains(altitudeRatio);
  drawProgressRing(altitudeRatio);
  drawDataOverlay();

  canvas->flush();  // 把 Canvas 記憶體緩衝區一次性推送到實體螢幕
}

// 校正成功時的閃爍動畫
void showCalibrationFlash() {
  for (int i = 0; i < 2; i++) {
    canvas->fillScreen(COLOR_WHITE);
    canvas->flush();
    delay(120);

    canvas->fillScreen(COLOR_BLACK);
    canvas->setTextColor(COLOR_WHITE);
    canvas->setTextSize(2);
    canvas->setCursor(48, 112);
    canvas->print("Calibrated!");
    canvas->flush();
    delay(120);
  }
  delay(300);
}


// ============================================================
//                       setup / loop
// ============================================================

void setup() {
  Serial.begin(115200);
  delay(1000);
  Serial.println("\n--- [System] 登山紀錄器啟動 ---");

  // 背光拉高,少了這步螢幕永遠是黑的
  Serial.println("[TFT] 設定背光腳位...");
  pinMode(TFT_BL, OUTPUT);
  digitalWrite(TFT_BL, HIGH);

  pinMode(BTN_PIN, INPUT_PULLUP);  // BOOT 鍵內部上拉

  // 初始化螢幕驅動
  Serial.println("[TFT] 正在初始化 Canvas...");
  if (!canvas->begin()) {
    Serial.println("[ERROR] 螢幕驅動初始化失敗!請確認 SPI 腳位設定。");
  } else {
    Serial.println("[TFT] 螢幕驅動初始化成功。");
  }

  COLOR_WHITE       = canvas->color565(255, 255, 255);
  COLOR_BLACK       = canvas->color565(0, 0, 0);
  COLOR_CREAM_GREEN = canvas->color565(205, 235, 195);  // 山頂雪色(淡綠白)

  canvas->fillScreen(COLOR_BLACK);
  canvas->flush();

  // 初始化感測器
  initSensor();

  // 讀取開機首次資料,用於初始化所有顯示值
  Serial.println("[Sensor] 正在讀取開機初始資料...");
  float rawAlt, rawPress;
  sampleSensor(rawAlt, rawPress);

  Serial.print("[Sensor] 開機讀數 → 氣壓: ");
  Serial.print(rawPress);
  Serial.print(" hPa | 海拔: ");
  Serial.print(rawAlt);
  Serial.println(" m");

  data.currentAltitude   = rawAlt;
  data.maxAltitude       = rawAlt;
  data.displayedAltitude = rawAlt;
  data.currentPressure   = rawPress;
  data.displayedPressure = rawPress;

  // 用開機海拔預填濾波緩衝區,防止啟動時數值從 0 跳變到實際海拔
  for (int i = 0; i < FILTER_SIZE; i++) altBuffer[i] = rawAlt;
  filterCount = FILTER_SIZE;

  Serial.println("--- [System] 初始化完成,進入主迴圈 ---");
}

// 感測器採樣計時器(每 1 秒採一次)
unsigned long lastSampleTime = 0;
const unsigned long SAMPLE_INTERVAL = 1000;

// 螢幕算繪計時器(約 33 fps)
unsigned long lastRenderTime = 0;
const unsigned long RENDER_INTERVAL = 30;

void loop() {
  handleButton();

  unsigned long now = millis();

  // --- 低頻任務:每 1 秒採樣一次感測器 ---
  if (now - lastSampleTime >= SAMPLE_INTERVAL) {
    lastSampleTime = now;

    float rawAltitude, rawPressure;
    sampleSensor(rawAltitude, rawPressure);

    float smoothed = smoothAltitude(rawAltitude);
    updateStats(smoothed);
    data.currentPressure = rawPressure;

    // 序列埠即時日誌,除錯時確認感測器是否正常運作
    Serial.print("[Loop] 原始: ");  Serial.print(rawAltitude);
    Serial.print("m | 濾波: ");     Serial.print(data.currentAltitude);
    Serial.print("m | 氣壓: ");     Serial.print(data.currentPressure);
    Serial.print(" hPa | 爬升: ");  Serial.println(data.totalAscent);
  }

  // --- 高頻任務:約 33fps 算繪 UI ---
  if (now - lastRenderTime >= RENDER_INTERVAL) {
    lastRenderTime = now;

    // 指數平滑插值:讓顯示數字平滑追蹤實際數值,0.12 係數控制追蹤速度
    data.displayedAltitude += (data.currentAltitude  - data.displayedAltitude) * 0.12f;
    data.displayedAscent   += (data.totalAscent      - data.displayedAscent)   * 0.12f;
    data.displayedDescent  += (data.totalDescent     - data.displayedDescent)  * 0.12f;
    data.displayedPressure += (data.currentPressure  - data.displayedPressure) * 0.12f;

    renderUI();
  }

  delay(2);
}
程式碼說明
整段程式碼分成四個模組,邏輯上互不干擾:
模組一:感測器讀取 — initSensor() 初始化 I2C 匯流排並偵測 BMP180 是否在線上,失敗就死迴圈印出錯誤,不會繼續往下走(方便快速定位問題)。sampleSensor() 每次讀出原始氣壓(Pa 轉 hPa)和海拔(以標準海平面 101325 Pa 為基準換算)。
模組二:資料處理 — smoothAltitude() 用 5 點滑動平均濾波降低感測器雜訊;updateStats() 帶 0.3 m 死區地累加爬升/下降,防止平路上的微小抖動讓累計數字虛漲。
模組三:按鍵與校正 — handleButton() 偵測 BOOT 鍵是否長按超過 2000 毫秒,觸發 doCalibration() 將爬升/下降歸零,以當前海拔為新基準重新開始統計。calibrationTriggered 旗標防止一次長按期間多次觸發。
模組四:UI 算繪 — 使用 Arduino_Canvas 雙緩衝,每幀先在記憶體裡把背景漸層、山峰(含動態雪線)、邊緣進度環、數字全部畫好,最後 canvas->flush() 一次推到螢幕,徹底消除逐行更新時的閃爍感。數字用指數平滑(係數 0.12)做動畫插值,變化自然不生硬。
loop() 裡用雙計時器分離「低頻採樣(1 秒一次)」和「高頻算繪(約 33 fps)」,兩者互不阻塞,整體回應很順暢。
常見問題排查
別慌,90% 的問題出在下面這幾個地方:
問題 1:螢幕完全黑屏,連背光都沒有
檢查 GPIO 7 是否在 setup() 裡執行了 digitalWrite(TFT_BL, HIGH)。背光不是自動亮的,程式碼裡少了這句螢幕永遠是黑的。同時確認 VCC 接的是 3.3 V,不是 5 V——5 V 會燒毀螢幕。
問題 2:螢幕有背光但全白或全黑,沒有畫面
打開序列埠監視窗(115200 鮑率)看有沒有 [ERROR] 字樣。如果出現 螢幕驅動初始化失敗,代表 SPI 腳位接錯了,對照接線表逐一檢查 CS / DC / SCK / MOSI / RST 五條線。
問題 3:序列埠一直印出 BMP180 初始化失敗,程式卡住不亮屏
BMP180 初始化失敗會進死迴圈,螢幕不會亮。原因 99% 是 I2C 接線問題:SDA 接 GPIO13、SCL 接 GPIO14,供電用 3.3 V,確認模組上的上拉電阻焊好了(正規成品模組通常已焊)。
問題 4:能正常顯示,但海拔數值和實際偏差很大
BMP180 以標準海平面氣壓(101325 Pa)為基準換算海拔,實際本地氣壓會隨天氣變化偏移,偏差 ±30 m 是正常範圍。如果你知道當前準確海拔,可以把 bmp.readAltitude(101325) 的參數換成當地實測的 QNH 海平面氣壓值(單位 Pa,可從天氣 App 取得,換算:hPa × 100 = Pa)。
問題 5:累計爬升數字一直在漲,明明沒動
感測器雜訊超過了死區(0.3 m)。可以把程式碼裡的 DEAD_ZONE 改大,例如 0.8f 或 1.0f;或者把 FILTER_SIZE 從 5 改到 8,增加平滑效果,兩種方法都能減少虛增。
問題 6:畫面更新有閃爍感
正常使用 Canvas 雙緩衝不該閃。如果還是閃,檢查 canvas->flush() 是否在 renderUI() 最後被呼叫,以及有沒有其他地方直接操作 gfx 繞過了 Canvas。
FAQ
Q:GC9A01 圓形螢幕可以換成其他型號的方屏嗎?
A:可以。Arduino_GFX_Library 支援幾十種螢幕驅動 IC(ST7789、ILI9341 等),把 Arduino_GC9A01 那行換成對應驅動類別名稱,Canvas 尺寸從 240×240 改成對應解析度,UI 程式碼基本不用改。
Q:BMP180 可以換成 BMP280 或 BME280 嗎?
A:可以,但需要換函式庫。BMP280 用 Adafruit_BMP280 函式庫,BME280 用 Adafruit_BME280 函式庫,readAltitude() 的呼叫方式略有差異。BMP280 精度更高,待機功耗約 2.74 µA;BME280 在此基礎上還支援濕度讀取,價格稍貴。
Q:BMP180 海拔精度是多少,室內測試數字一直跳是正常的嗎? A:BMP180 標準模式精度 ±1 m,高解析度模式可達 ±0.5 m。室內讀數跳動完全正常——開窗、關門、空調氣流都會引起氣壓微變,進而影響海拔讀數。本專案用了 5 點滑動均值 + 0.3 m 死區來抑制這種抖動,實際使用中效果已經不錯了。
Q:ESP32-S3 的 SPI(螢幕)和 I2C(感測器)可以同時使用嗎? A:完全沒問題。SPI 和 I2C 是獨立的周邊匯流排,本專案裡 GC9A01 走 SPI(GPIO11/12),BMP180 走 I2C(GPIO13/14),各用各的,互不干擾。ESP32-S3 同時驅動兩條匯流排沒有任何問題。
Q:程式碼裡的 Arduino_Canvas 是什麼,能不能刪掉直接用 gfx 繪圖?
A:Arduino_Canvas 是 Arduino_GFX_Library 提供的雙緩衝畫布——所有繪圖指令先寫入記憶體裡的虛擬畫布,呼叫 flush() 時再一次推到螢幕,消除逐行更新時的閃爍感。刪掉改成直接操作 gfx 在功能上還能跑,但畫全螢幕漸層背景時閃爍會非常明顯,體驗差很多,不建議。
Q:ESP32-S3 能用鋰電池供電帶著爬山嗎? A:可以。3.7 V 鋰電池 + TP4056 充放電模組 + ME6211 LDO 穩壓到 3.3 V 是常見方案。本專案設定下 ESP32-S3 + GC9A01 + BMP180 綜合工作電流約 80~120 mA,一顆 500 mAh 電池理論續航 4~6 小時,夠應付一次日間徒步。如需更長續航,可以降低螢幕背光亮度(PWM 調光 GPIO7)或拉長感測器採樣間隔。
延伸玩法
做完這個版本之後,還可以繼續折騰:
- 加 SD 卡紀錄軌跡:每隔 10 秒把時間戳 + 海拔 + 氣壓寫入 CSV 檔案,回來匯入 GPS 軌跡軟體做資料分析
- 加 GPS 模組融合定位:BMP180 會受天氣影響飄移,GPS 海拔精度約 ±10 m 但更穩定,兩者融合可以互補
- 接陀螺儀 MPU6050 計步:偵測步伐節奏估算步數,升級為完整的徒步資料儀
- BLE 藍牙推送資料到手機:用 ESP32-S3 的 BLE 把即時資料發送到手機 App,搭配地圖顯示完整軌跡